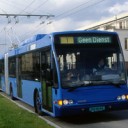
What did I do wrong this time?...
Also I couldn't get the smooting thing to work without having a worse than it already was situation.
This is the best I could make, guess I has to do (little gap and some sharp edges)
Thanks again!


Wir begrüßen euch in der Fan-Community zu den Spielen Transport Fever und Train Fever, den Wirtschaftssimulatoren von Urban Games. Die Community steht euch kostenlos zur Verfügung damit ihr euch über das Spiel austauschen und informieren könnt. Wir pflegen hier einen freundlichen und sachlichen Umgang untereinander und unser Team steht euch in allen Fragen gerne beiseite.
Die Registrierung und Nutzung ist selbstverständlich kostenlos.
Wir wünschen euch viel Spaß und hoffen auf rege Beteiligung.
Das Team der Transport-Fever Community
What did I do wrong this time?...
Also I couldn't get the smooting thing to work without having a worse than it already was situation.
This is the best I could make, guess I has to do (little gap and some sharp edges)
Thanks again!
1. Try apply scale and rotation
2. Activate the edge split modifier, disable the edge split depending on edge degree and activate the other checkbox. Mark the edge that should be sharp (between body and your part?) and mark it as sharp (strg + e), you may get better results. Do not apply the modifier!
You can still use the degree option for the modifier and mark the edge as sharp/shade flat.
Thanks, but didn't work
Tried the first one, with different angels.
The bus complety disappeared by doing this, It wasn't even visible in the buying menu.
Also tried to export it with different angels, no luck:-(
@Marcolino, tried that already.
Just found a new tutorial, will try to do that tomorrow.
Yes the tutorial describes Marcolinos way, but that method is a bit inprecise because you don't select exactly the edges you want to keep sharp.
I didn't knew you where using 2.8 so all my tips are for 2.7. Here are some screenshots how my way works in 2.7: Modding Anfängerfragen
Thanks, maybe will try it in 2.7 after I know how to export the file
I tried different angels and different options for exporting the file but nothing seems to work.
I also tried the original file and broke that one too.
First I convert the mesh to .obj than imported the .obj with blender.
And then export it with merks add-on, also the export menu seems different than in the guide?
vs below in the guide
I have the top one - it looks right
Which guide is that? I know a guide but that's for fbx export not addon mesh export
For mesh export, you don't have to write really anything in there. It will just get exported in the res folder somewhere with train.
Since you only need the meshs and nothing else, you don't really have to care. Just export.
Hello Marcolino,
That is from the guide I found in the
Modding Guide: Anleitung für Anfänger zum Erstellen eines Mods
And then clicked on:
But if the export settings are right, what I'm a doing wrong?
Maybe the importing of the mesh or converting?
I'm using a converter called "TFconverter" which than makes an .obj from the mesh.
The blender import/export addon can import meshes as well, you just need to add the missing entries (e.g. material) in the mesh file to make a TPF2 mesh to a TPF1 mesh.
The different export menus, I believe I have them both staked over each other, but I will take a look at it.
About the broken rotation, I can just repeat my question if you tried "apply scale and rotation".
Hello Bauer33333,
I just googled it and I think now what you meant and it helped, thanks a lot!!
I had to apply the changes otherwise the rotation was exported all allong, so it didn't change at all...
https://artisticrender.com/how…e-apply-scale-in-blender/
Now I only have to figure out how to do the rest.
I will focus on the UV-map, because I think it's impossible to do top, without doing the front al over again.
This is because edges and Vertex are impossible to connect.
Yes, thats what I meant. Now the bus looks a lot better ![]()
But that mesh is currently a mess and thats why the shader gives that ugly result (it's unvergiving).
You can add Vertices by cutting a Face with the knife tool (shortcut 'K' in my version). Just cut from an existing vertex to the point on the edge where the new vertex should be. It can only cut faces so you will always need to select a minimum of two points with a face in between.
Oké, thanks I will try.
Do you also have some tips about the UV map.
It seems the color is only on the wrong side of a face.
In the first picture you see the color the front should have and in the second picture you see the color of the back.
So in the first picture the back is invisible and in the first picture front?
I did not understand that completely, but you may check if the normals are facing the right way. There is a button somewhere to make them visible. Normals that face the wrong way can mess the shader up, too.
Use twosides = true parameter (don't know the exact name) in mtl
The problem is that in Blender it looks like this:
And in Transport Fever like this:
(It doesn't show the front side of the new mesh, also one face is missing and when looking from the back vice versa).
Ctrl+N to change the normal facing
Thanks Marcolino, That was indeed the probleem.
I will slightly change it a bit and then it's finished.
However there occurred a new problem![]()
I think it's because of rotating the mesh. the trolleybus is a lot darker (looks dirty) any ideas?
In the first picture the trolleybuses use the same .dds only the first one has the problem.
Same issue other livery and other side of the trolleybus:
In the second picture I forgot to rotate the mesh, and this shows no color problem.
Thanks for your patience.
I don't think the problem is in the UV-map or the mesh.
But in a MTL or MDL or whatever.
I already tried to delete the .tga for the dirt etc. but didn't help.
Could It have something to do with, the error I get when exporting in Blender?
No.
I don‘t see a color difference in your pictures.
